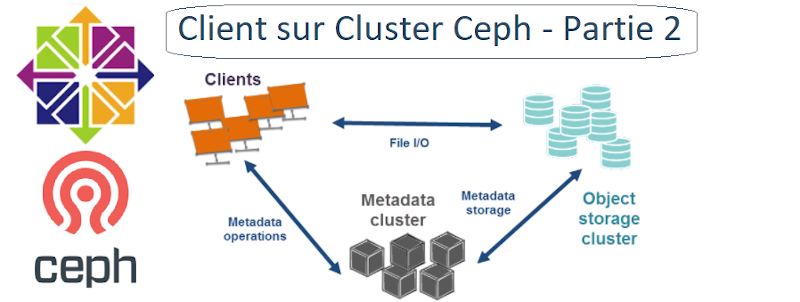
Le But est de connecter un client Linux et monter un volume sur le volume groupe des machines OSD.
node-Ceph-client1 (centos7)
IP : 172.16.186.46
Disque 1 – Système 10Go
RAM 2G
1vCPU
I. Prérequis au Client
1°) ajouter au DNS le nouveau Client
MODOP – Configurer un DNS Primaire et Secondaire – Centos7
root@floki03:~# ssh -l root dns-pri
[root@dns-pri ~]# vi /var/named/forward.house.cpb
; Cluster CEPH
node01-ceph-admin IN A 172.16.186.40
node02-ceph-mon1 IN A 172.16.186.41
node03-ceph-osd1 IN A 172.16.186.42
node04-ceph-osd2 IN A 172.16.186.43
node05-ceph-osd3 IN A 172.16.186.44
node06-ceph-osd4 IN A 172.16.186.45
node-ceph-client1 IN A 172.16.186.46
Le reverse
[root@dns-pri ~]# vi /var/named/reversevmbr3.house.cpb
40 IN PTR node01-ceph-admin.house.cpb.
41 IN PTR node02-ceph-mon1.house.cpb.
42 IN PTR node03-ceph-osd1.house.cpb.
43 IN PTR node04-ceph-osd2.house.cpb.
44 IN PTR node05-ceph-osd3.house.cpb.
45 IN PTR node06-ceph-osd4.house.cpb.
46 IN PTR node-ceph-client1.house.cpb.
[root@dns-pri ~]# systemctl reload named
2°) Installation des middlewares
[root@node-ceph-client1 ~]# yum update -y
[root@node-ceph-client1 ~]# yum install -y htop nmap net-tools wget
3°) Installation ntpd
[root@node-ceph-client1 ~]# yum install ntp ntpdate ntp-doc -y
[root@node-ceph-client1 ~]# chkconfig ntpd on
[root@node-ceph-client1 ~]# ntpdate pool.ntp.org
[root@node-ceph-client1 ~]# systemctl start ntpd
4°) Désactivation Selinux
[root@node-ceph-client1 ~]# sed -i 's/SELINUX=enforcing/SELINUX=disabled/g' /etc/selinux/config [root@node-ceph-client1 ~]# reboot
5°) Désactivation IPv6
[root@node-ceph-client1 ~]# vi /etc/sysctl.conf
net.ipv6.conf.all.disable_ipv6 = 1
net.ipv6.conf.all.autoconf = 0
net.ipv6.conf.default.disable_ipv6 = 1
net.ipv6.conf.default.autoconf = 0
[root@node-ceph-client1 ~]# sysctl -p
6°) Création Utilisateur
[root@node-ceph-client1 ~]# useradd -d /home/cephuser -m cephuser
[root@node-ceph-client1 ~]# passwd cephuser
[root@node-ceph-client1 ~]# echo "cephuser ALL = (root) NOPASSWD:ALL" >> /etc/sudoers.d/cephuser
[root@node-ceph-client1 ~]# chmod 0440 /etc/sudoers.d/cephuser
[root@node-ceph-client1 ~]# sed -i s'/Defaults requiretty/#Defaults requiretty'/g /etc/sudoers
II. Connexion SSH (node01-Ceph-admin)
1°) Ajouter le nouveau Client au config SSH
root@floki03:~# ssh -l root node01-ceph-admin
[root@node01-ceph-admin ~]# su - cephuser
[cephuser@node01-ceph-admin ~]$ vi ~/.ssh/config
Host node-ceph-client1
          Hostname node-ceph-client1
          User cephuser
[cephuser@node01-ceph-admin ~]$ chmod 644 ~/.ssh/config
2°) Déployer la clef ssh
Vérifions que le client1 est joignable
[cephuser@node01-ceph-admin ~]$ ping -c 3 node-ceph-client1

[cephuser@node01-ceph-admin ~]$ ssh-keyscan node-ceph-client1 >> ~/.ssh/known_hosts

[cephuser@node01-ceph-admin ~]$ ssh-copy-id node-ceph-client1

III. Install Ceph sur le Client
node01-Ceph-admin
root@floki03:~# ssh -l root node01-ceph-admin
[root@node01-ceph-admin ~]# su - cephuser
[cephuser@node01-ceph-admin ~]$ cd cluster
1°) Déployer l’installation Ceph sur le client
[cephuser@node01-ceph-admin cluster]$ ceph-deploy install node-ceph-client1

2°) Déployer l’admin sur le client
[cephuser@node01-ceph-admin cluster]$ ceph-deploy admin node-ceph-client1

3°) Ajuster les droits
[cephuser@node01-ceph-admin cluster]$ ssh node-ceph-client1
[cephuser@node-ceph-client1 ~]$ sudo chmod 644 /etc/ceph/ceph.client.admin.keyring
IV. montage disque Ceph Client
node01-Ceph-client
[cephuser@node01-ceph-admin cluster]$ ssh node-ceph-client1
1°) Création rbd image
Notre montage de disque sera de ~35G sur les 60Go disponible.
[cephuser@node-ceph-client1 ~]$ rbd create disk01 --size 35840
[cephuser@node-ceph-client1 ~]$ rbd ls -l

2°) Activer RBD module
[cephuser@node-ceph-client1 ~]$ sudo modprobe rbd
[cephuser@node-ceph-client1 ~]$ sudo rbd feature disable disk01 exclusive-lock object-map fast-diff deep-flatten
3°) Map Disque RBD sur Linux
[cephuser@node-ceph-client1 ~]$ sudo rbd map disk01
/dev/rbd0
[cephuser@node-ceph-client1 ~]$ rbd showmapped
id pool image snap device
0 rbd disk01 - /dev/rbd0
4°) Format du disk /dev/rbd0 en XFS
[cephuser@node-ceph-client1 ~]$ sudo mkfs.xfs /dev/rbd0

5°) mount du disque vers /mnt/data
[cephuser@node-ceph-client1 ~]$ sudo mkdir -p /mnt/data
[cephuser@node-ceph-client1 ~]$ sudo mount /dev/rbd0 /mnt/data
[cephuser@node-ceph-client1 ~]$ df -H /mnt/data
Sys. de fichiers Taille Utilisé Dispo Uti% Monté sur
/dev/rbd0 38G 35M 38G 1% /mnt/data
[cephuser@node-ceph-client1 ~]$ df -hT

V. Monter RBD au BOOT
node01-Ceph-client
1°) script BASH
[cephuser@node-ceph-client1 ~]$ cd /usr/local/bin/
[cephuser@node-ceph-client1 bin]$ sudo vi rbd-mount

#!/bin/bash
# Nom du Pool de Disque OSD
export poolname=rbd
# nom du disque rbd
export rbdimage=disk01
# Point de montage du disque
export mountpoint=/mnt/data
if [ "$1" == "m" ]; then
          modprobe rbd
          rbd feature disable $rbdimage exclusive-lock object-map fast-diff deep-flatten
          rbd map $rbdimage --id admin --keyring /etc/ceph/ceph.client.admin.keyring
          mkdir -p $mountpoint
          mount /dev/rbd/$poolname/$rbdimage $mountpoint
fi
if [ "$1" == "u" ]; then
          umount $mountpoint
          rbd unmap /dev/rbd/$poolname/$rbdimage
fi
[cephuser@node-ceph-client1 bin]$ sudo chmod +x rbd-mount
2°) Créer du service « rbd-mount.service »
[cephuser@node-ceph-client1 bin]$ cd /etc/systemd/system/
[cephuser@node-ceph-client1 system]$ sudo vi rbd-mount.service

[Unit]
Description=RADOS block device mapping for $rbdimage in pool $poolname"
Conflicts=shutdown.target
Wants=network-online.target
After=NetworkManager-wait-online.service
[Service]
Type=oneshot
RemainAfterExit=yes
ExecStart=/usr/local/bin/rbd-mount m
ExecStop=/usr/local/bin/rbd-mount u
[Install]
WantedBy=multi-user.target
3°) Démarrer et activer le service « rbd-mount.service »
[cephuser@node-ceph-client1 system]$ sudo systemctl daemon-reload
[cephuser@node-ceph-client1 system]$ sudo systemctl enable rbd-mount.service
Stopper/Redémarrer la machine et vérifier que le point de montage est bien restauré.

Views: 15

